In this post, I’ll walk through how to configure both Playwright Test (JavaScript/TypeScript) and Playwright .NET to get test results in Azure Test Plans. Each option uses abstractions built on the Azure DevOps REST API so you don’t have to write additional code to accomplish this.
Why?
Azure Test Plans is a popular service that many teams are using for manual testing. By publishing your automated Playwright tests to the service, you get a couple of benefits:
- Traceability. This gives you the option to link your requirements (Azure Boards) to automated tests and the pipeline that ran them. By mapping the two, you can establish the quality of the requirements based on test results. Ideally, a test case is created for each of the acceptance criteria listed for the requirement.
- History. Drilling into every pipeline run to see test results over time is a pain. Azure Test Plans allows you to see results through features like the progress report and charts.
- Test inventory. By tracking automated AND manual test cases, you can do things like track the status of a test case (not automated, planned to be automated, or automated). This makes it easy to track the progress of automated testing efforts, e.g. how many manual tests have been converted to automated, how many remain, etc.
What are the options?
I’ll show working code examples for both Playwright Test (TypeScript) and Playwright .NET using NUnit. If you’re already sick of reading and want to see them in action, here are some links.
TypeScript: tests, pipeline to run tests, test plan
.NET: tests, build to publish binaries, release to run tests, test plan
Playwright Test (TypeScript)
playwright-azure-reporter is a custom reporter (npm package) that allows you to post test results by annotating your test case name with the Azure test plan ID. The README has instructions for installing the package and adding the reporter to playwright.config.ts
My example project’s config looks like this: playwright.config.ts.
Once that is in place:
- Manually create new test cases in Azure Test Plans taking note of the ID (planID in query string of URL)
- Add the ID in brackets to the test case title. 444, 445 in this example:
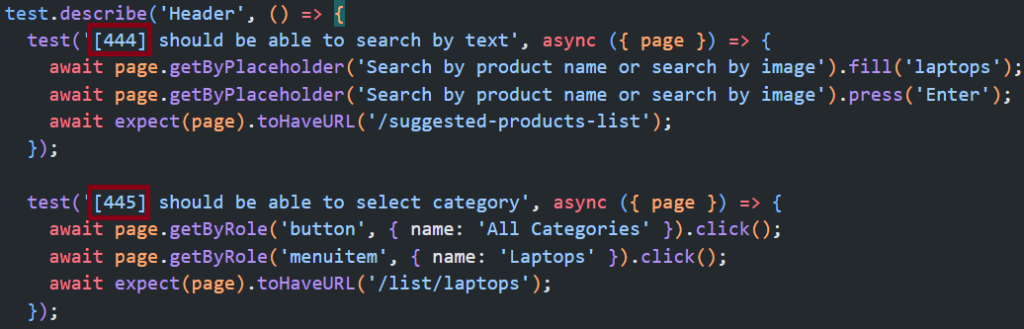
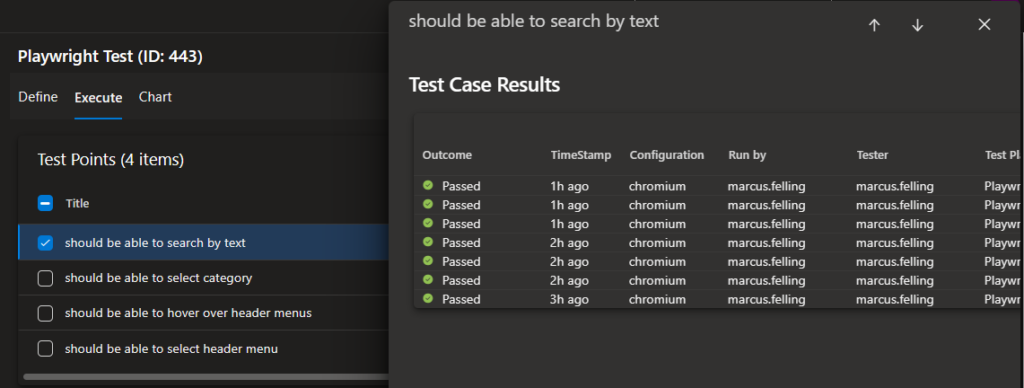
When these tests get run, you will then be able to see the outcome for each test case:
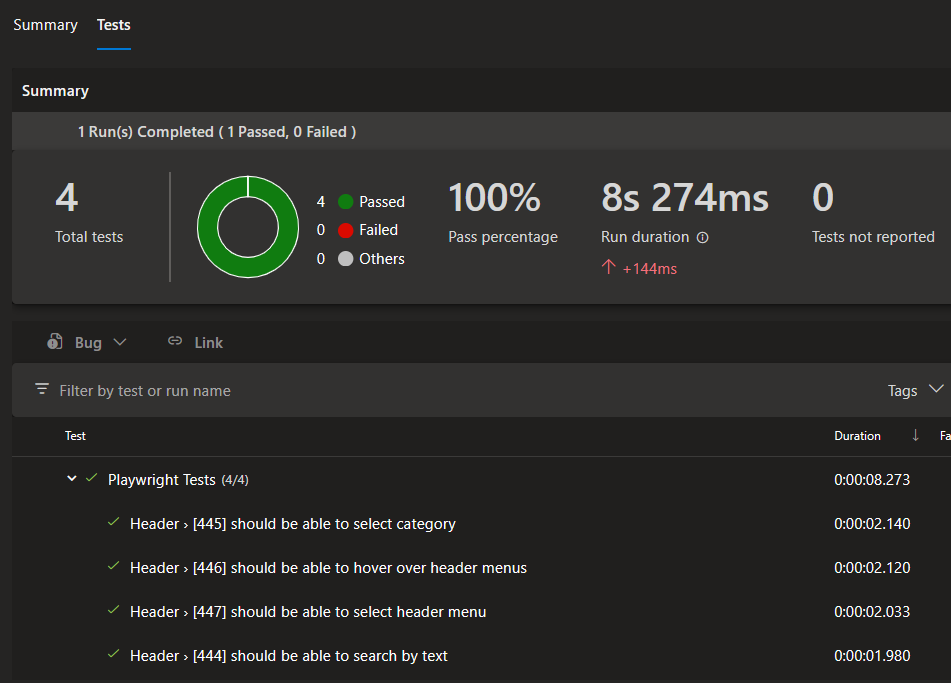
My example pipeline runs these tests for every commit on main and also uses the JUnit reporter to publish results to the pipeline’s Test tab:
Playwright .NET
This option works out of the box but has some caveats and complexity: A Windows runner and a release pipeline are required to use the Visual Studio test platform installer and Visual Studio Test tasks. Also, Visual Studio must be used to associate test cases.
Here is how I set this up in my example project:
- Manually create new Azure Test Plans test cases
-
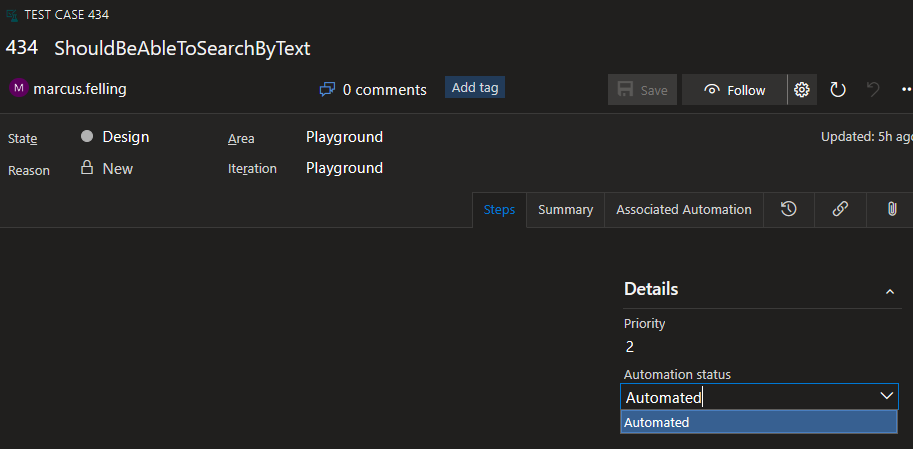
Use Visual Studio’s test explorer to associate the automated test cases:
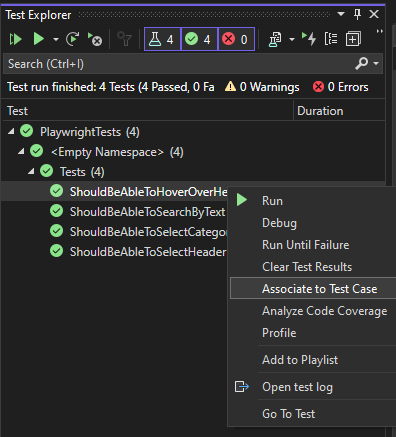
This will change the Automation status field on the test case work item to automated:
Once the test cases are configured, we can set up our pipelines to run the tests.
-
Create a build pipeline that runs
dotnet publish(using Windows agent) in order to create an artifact with the Playright binaries: playwright-dotnet.yml -
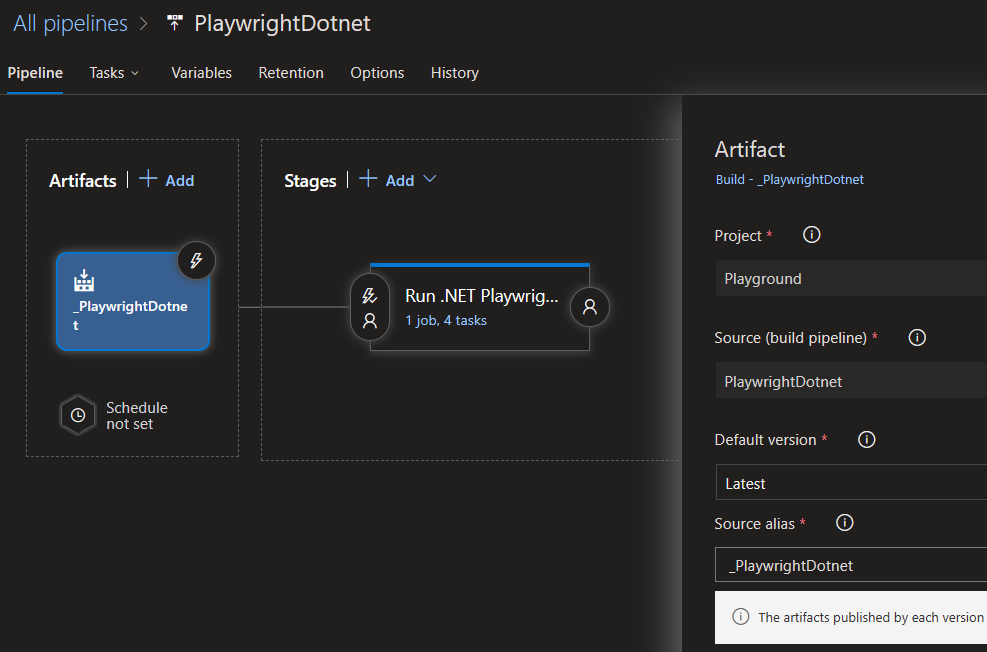
Create a release pipeline referencing the artifact created in the previous step:
- Add install tasks (that run on Windows agent) for “Visual Studio Test Platform Installer” (prereq for VS Test task), .NET, and Playwright browsers:
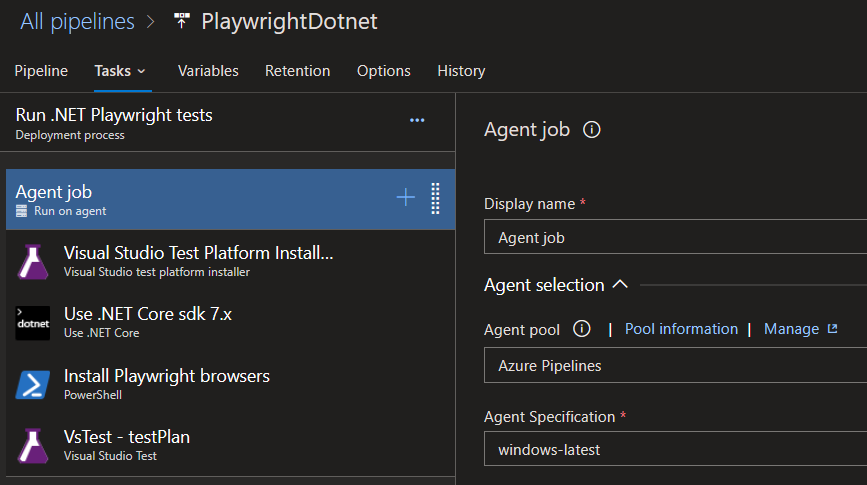
- Add the VS Test task and reference your test plan:

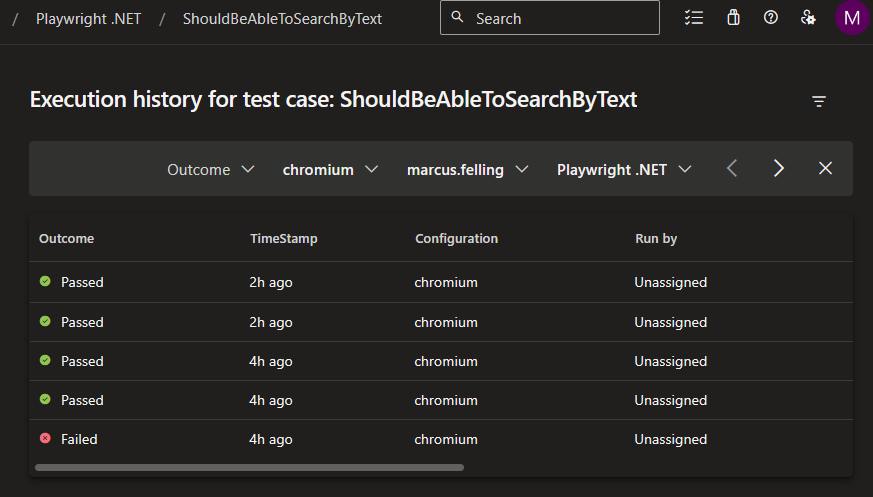
- Create a new release to run the tests. Example results: Test tab, test plan results.
Summary
Hopefully, you were able to follow my examples to get this set up in your own environment. I’d love to hear feedback on anything I may have missed, new features you’d like to see from the product team at Microsoft, or interesting use cases you have experience with.
Happy testing, Marcus
]]> ](/content/uploads/2023/04/test-step-example.png)
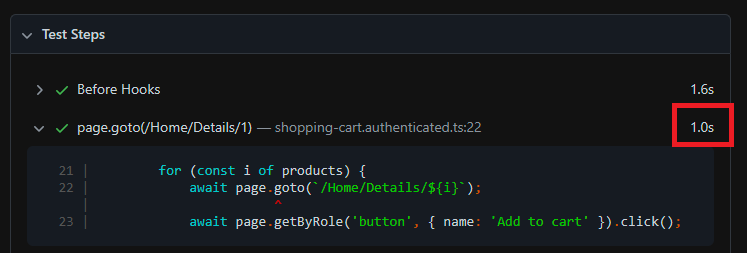
HTML report test step duration
](/content/uploads/2023/04/test-step-example.png)
HTML report test step duration ](/content/uploads/2023/04/performance-playwright-html-report.png)
 ](/content/uploads/2023/02/process-node-core-module.png)
 ](/content/uploads/2023/02/gha-secrets-playwright.png)
 ](/content/uploads/2023/02/example-dotenv-file.png)
 ](/content/uploads/2021/11/github-pages-configuration.png)
 ](/content/uploads/2021/07/buildBicepValidatePipeline.png)
 ](/content/uploads/2021/07/githubactionspipelinebicepazure.png)
 ](/content/uploads/2021/02/image.png)