Setting up SonarQube (on Windows) with Azure Pipelines
I recently setup a new SonarQube instance to perform static code analysis as part of CI builds. In this post I’d like to document what I learned to hopefully make it easier for you (I assume that’s why you’re reading this).
I’m not going to go into details on requirements and installation as those are well documented. What I’d like to go over are details on configurations for Windows, SQL Server, and Azure Pipelines.
The install itself is pretty straight forward. I used SonarQube CE 7.6 on a Windows Server 2016 VM with a SonarQube DB on SQL Server 2016. However, I did run into DB connection issues using Integrated Security, as indicated in logs\sonar.log. After downloading the Microsoft SQL JDBC driver package and copying sqljdbc_auth.dll to my path (C:\Windows\System32), I was able to get it started up. my connection string in sonar-project.properties looks like this:
# Microsoft SQL Server 2014/2016 and SQL Azure
sonar.jdbc.url=jdbc:sqlserver://$DBINSTANCENAME;databaseName=SonarQube;integratedSecurity=true
LDAP Configuration
Once my instance was up and running on http://localhost:9000, I wanted to configure LDAP so users could log in using their Active Directory credentials. My properties file ended up looking like this ($ denotes a variable):
# LDAP CONFIGURATION

# Enable the LDAP feature
sonar.security.realm=LDAP

# Set to true when connecting to a LDAP server using a case-insensitive setup.
sonar.authenticator.downcase=true

# URL of the LDAP server. Note that if you are using ldaps, then you should install the server certificate into the Java truststore.
ldap.url=LDAP://$PREFERREDDOMAINCONTROLLERNAME:Port

# Bind DN is the username of an LDAP user to connect (or bind) with. Leave this blank for anonymous access to the LDAP directory (optional)
ldap.bindDn=CN=$SERVICEACCOUNTNAME,OU=Users,DC=$DOMAIN

# Bind Password is the password of the user to connect with. Leave this blank for anonymous access to the LDAP directory (optional)
ldap.bindPassword=$SERVICEACCOUNTPWD

# USER MAPPING

# Distinguished Name (DN) of the root node in LDAP from which to search for users (mandatory)
ldap.user.baseDn=DC=$DOMAIN

# LDAP user request. (default: (&(objectClass=inetOrgPerson)(uid={login})) )
ldap.user.request=(&(objectClass=user)(sAMAccountName={login}))

# GROUP MAPPING

# Distinguished Name (DN) of the root node in LDAP from which to search for groups. (optional, default: empty)
ldap.group.baseDn=DC=$DOMAIN

# LDAP group request (default: (&(objectClass=groupOfUniqueNames)(uniqueMember={dn})) )
ldap.group.request=(&(objectClass=group)(member={dn}))
Save the properties file with the new values above, then restart the service. Check the logs (\logs\web.log) and you should see a line indicating the LDAP connection was successful:
INFO web[][o.s.p.l.LdapContextFactory] Test LDAP connection on LDAP://$DBINSTANCENAME:PORT: OK
User should now be able to login using their AD credentials.
Azure DevOps Integration
Next up is using the SonarQube Azure DevOps Marketplace Extension to setup a dedicated SonarQube EndPoint. The endpoint will define the SonarQube server to be used in SonarQube build tasks for CI builds.
- Head to the marketplace and install the SonarQube Azure DevOps Extension
- Go to Project Settings -> Pipelines: Service Connections
- New Service Connection -> SonarQube
- Add a connection name (I used “SonarQube”), Server URL, and Token.
To generate a token, login to SonarQube, go to your profile (upper right) -> My Account, click the Security Tab, enter a token name -> Generate.
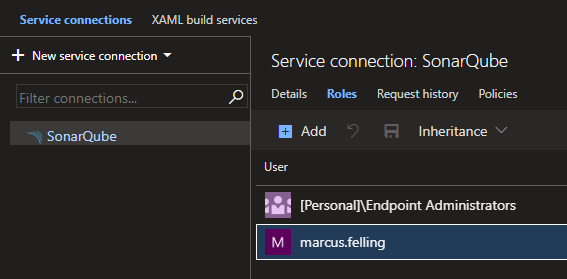
Next, you will want to make sure proper permissions are setup. Users that will be configuring the build definitions will need permissions to use the new Service connection. By default, the group [projectName]\Endpoint Administrators is added. Add new users to that group, add a new group, or add individual users to suit your needs.
Azure Pipelines Configuration
Now that we have a service connection, we can add the SonarQube build tasks to a build definition. For this post, I’m going to use the Visual Designer. Later on you can convert to YAML if you choose to do so.
-
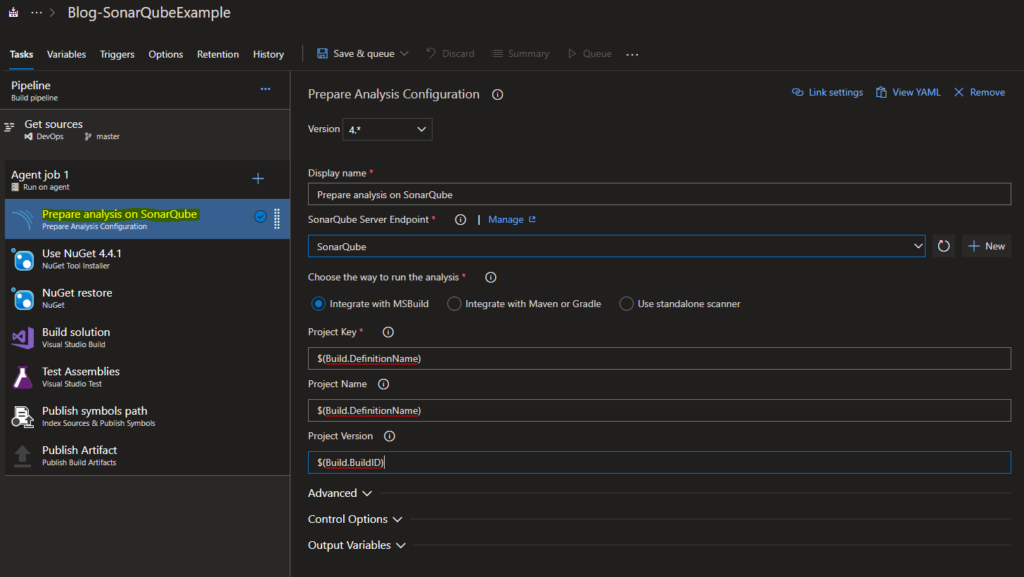
Add the task: Prepare Analysis Configuration
This step needs to be added as the first task in the definition. When SonarQube uploads the analysis it will automatically create the new project using the Project Name, Project Key, and Project Version. I chose to use Azure DevOps Predefined Variables for these values.
-
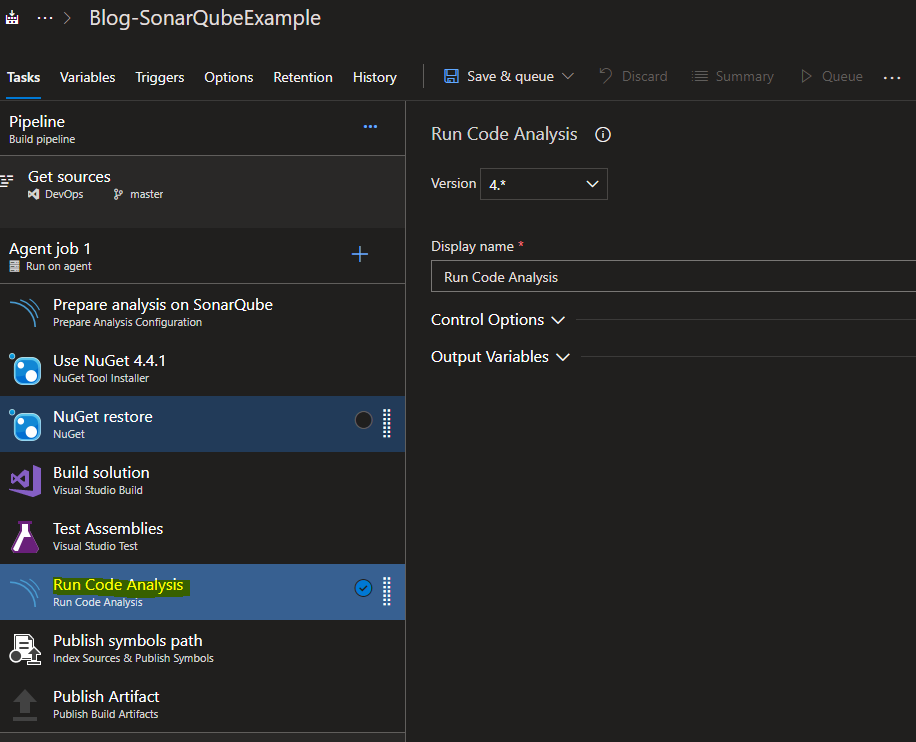
Add the task: Run Code Analysis
You will want to add this task towards the end of the build.
-
Add the task: Publish Quality Gate Result (Optional)
This task will display the Quality Gate status in the build summary and give you a sense of whether the application is ready for production “quality-wise”.
Note: This task can significantly increase build time because it polls the SonarQube server until the analysis is complete.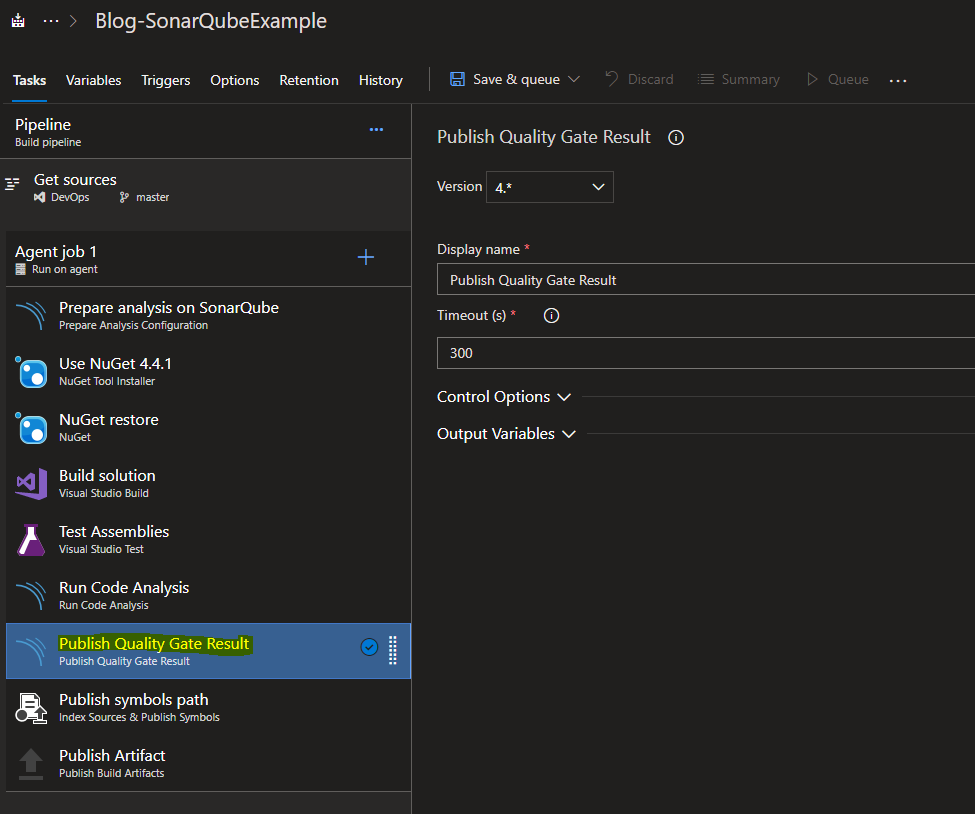
Our build definition is now ready. You will notice that adding the new SonarQube tasks will add a new demand, requiring Java as as an agent capability. This means you will need to install Java on your build server if you’re using a Private agent/pool.

-
Time to queue the build!
SonarQube
After running the build with the SonarQube tasks, you should now see a new project in SonarQube.

That’s all for now folks…